Ottoman Cover Tutorial
Need a quick way to refresh your living room without spending big bucks? That is exactly what I was looking for when I decided to recover our well worn ottoman. The old ottoman has been been around about 7 years. It is covered with stains and I am just plain sick of it.
I began scanning upholstery fabrics on fabric.com and found so many that I fell in love with. That’s when I knew this was a must-do project. Sew easy!
Okay so here are the steps to creating your very own cover that can be easily removed for washing.
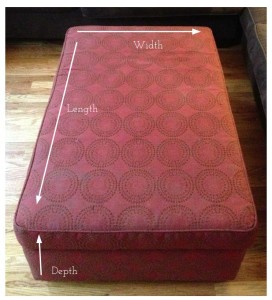
Step 1: Measure the length, depth and height of your existing ottoman.
Step 2: Cut your first piece of fabric, the top. This will be the size of the top of the ottoman, but you’ll add 1″ to the length & 1″ to the depth.
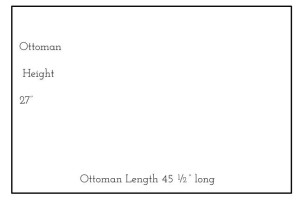
So in my case, my ottoman measured 45 1/2″ long x 27″ wide. So my first piece of fabric measures 46 1/2″ long x 28″ wide.
Step 3: Cut your front & back fabric pieces. Front & back will be the same size and will measure 1″ larger than the length x 3″ larger than the height.
Step 4: Cut your two sides pieces. The two sides pieces will be the same size and will measure 1″ larger than the depth x 3″ larger than the height.
Step 5: With 1/2″ seam allowance and with right sides together, sew the front piece to the longer side of the top piece. Then repeat with the back piece, sewing it to the opposite side.
Step 6: With 1/2″ seam allowance and with right sides together, sew the first side piece to the shorter side of the top piece. Then repeat with the other side piece, sewing it to the opposite side. Quick hint: Leave about 1″ on either side un-sewn, this will help make the corners more symetrical.
Step 7: With right sides together and using 1/2″ seam allowance, sew the side of the front piece to the side of the side piece. Repeat with the other side of the front piece and the other side piece.
Step 8: With right sides together & using 1/2″ seam allowance, sew the side of the back piece to the side of the side piece. Repeat with the other side of the back piece and the other side piece. Should start to resemble a 3D cube similar in size to your ottoman.
Step 9: Try it on your existing ottoman (after you’ve cleaned and febreezed it) and if it needs to be tighter you can reinforce your existing seams with slightly larger seam allowances.
Step 10: Fold up the bottom edge of the cover to just above the floor and pin in place all the way around the cover.
Step 10: Sew this hem in place all the way around and you are finished.


